¶ XignIn SPI Plugin v2
The XignIn Plugin V2 consists of 3 possible components:
- a management plugin for user onboarding, automated authentication flow configuration
- a authentication plugin to facitlitate authentcation via XignIn
- the corresponding themes, that must be enabled to be configurable via UI
¶ XignIn Management Plugin
¶ User Onboarding
Users can be onboarded via three different ways:
- Self Service
- Per Invite
- Realm User Registration
¶ 1. Self-Service (Link for existing XignIn and new XignIn)
The user can link his/her account via the account console. To enable this feature, the XignIn-Account Theme has to be activated. The theme will add a new menu item XignIn Settings to the navigation. The user can use his existing XignIn account (if registrered in the corresponding XignIn-Manager) or register a new one. To register a new account the user has to choose New To XignIn otherwise Existing XignIn User.
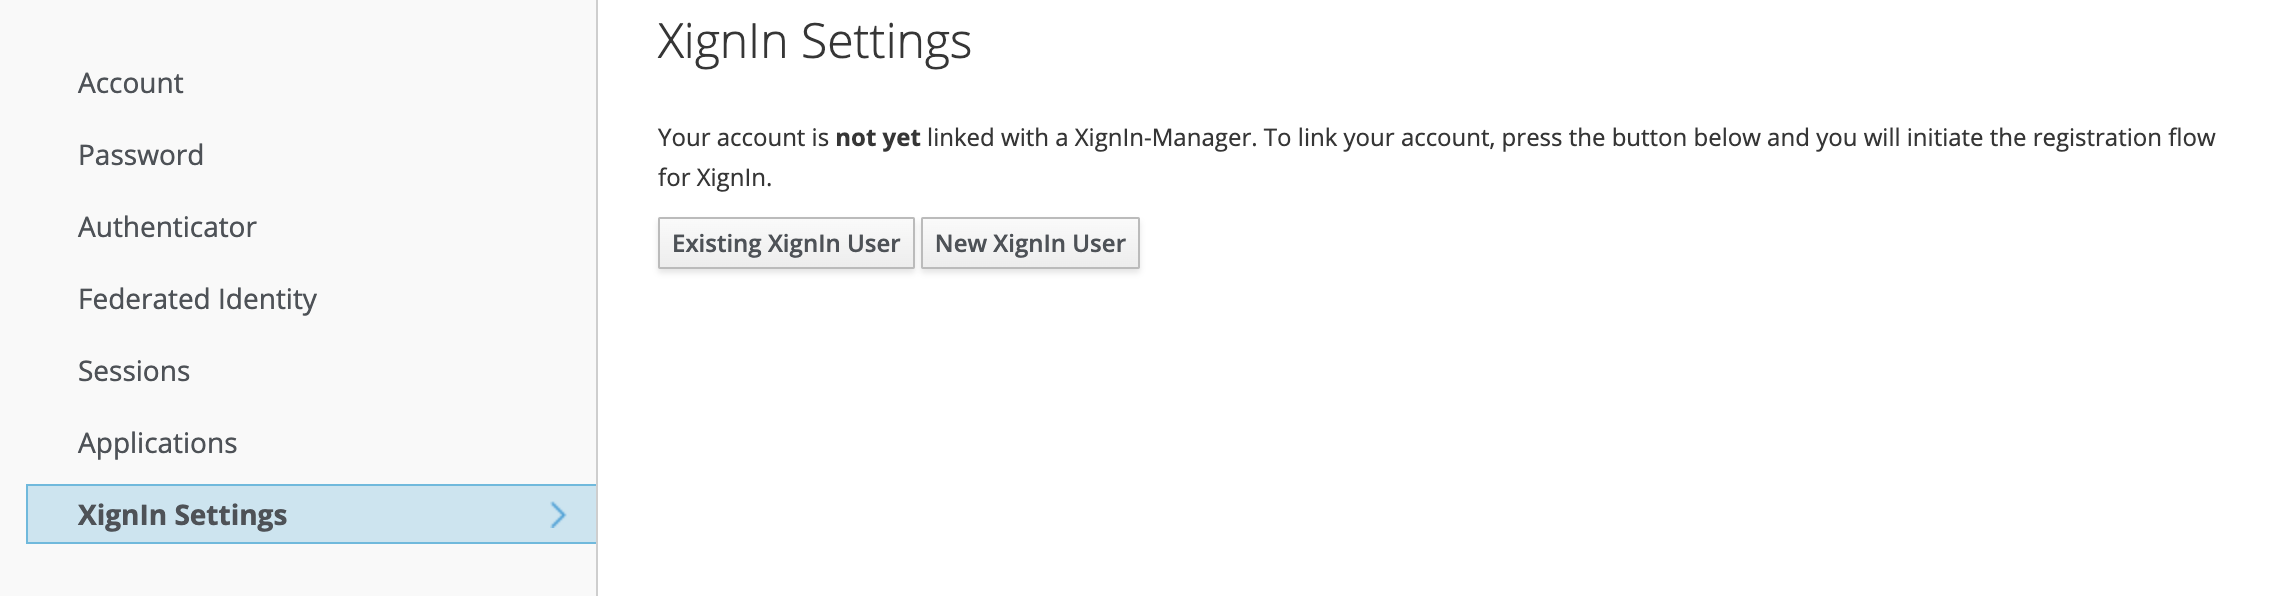
Fig. XignIn Settings Account View
¶ 2. Invite (Link for existing XignIn and new XignIn)
To use this feature the XignIn admin console theme and the email theme have to be activated. Additionally, the Email-Provider has to be configured via the realm settings and administrator has to upload the client meta data downloaded from the XignIn-Manager management console. When clicking the link, the user is automatically logged into the account console displaying the XignIn Settings page. From here on the flow is identical to the self-service onboarding flow.
¶ 3. Registration (Keyclaok Account & XignIn Account)
To use this feature the XignIn login theme has to be activated and the realm has to be configured to allow self-registration and the option Show SignUp has to be enabled in the XignIn execution configuration.
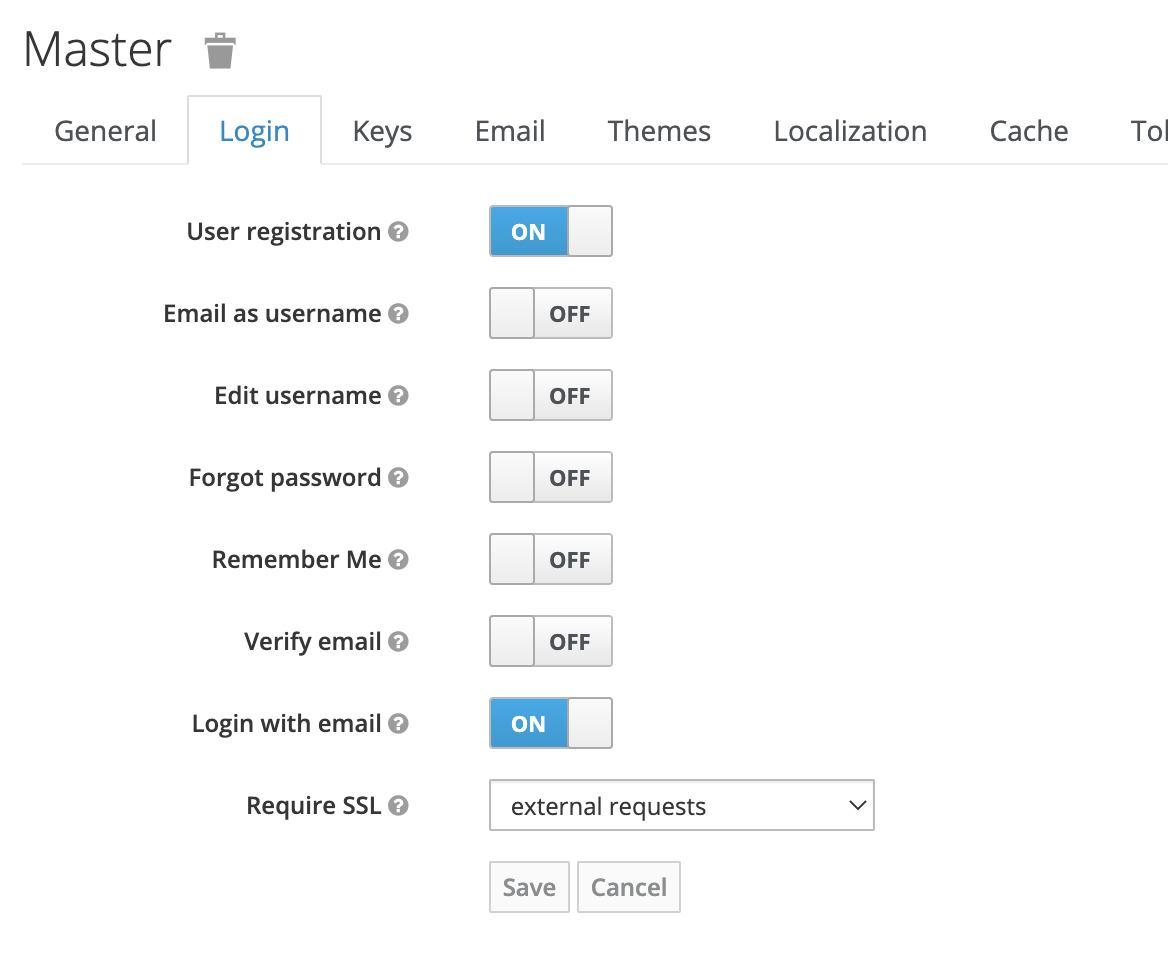
Fig. Enable Realm Registration
If both is configured a link will disappear at the bottom of the login form, by which the user can trigger the self-registration, either via
standard (Password & username) or XignIn.

Fig. Realm Registration Link
The user can choose to create a new account, or use his existing XignIn account to link with his keycloak profile.
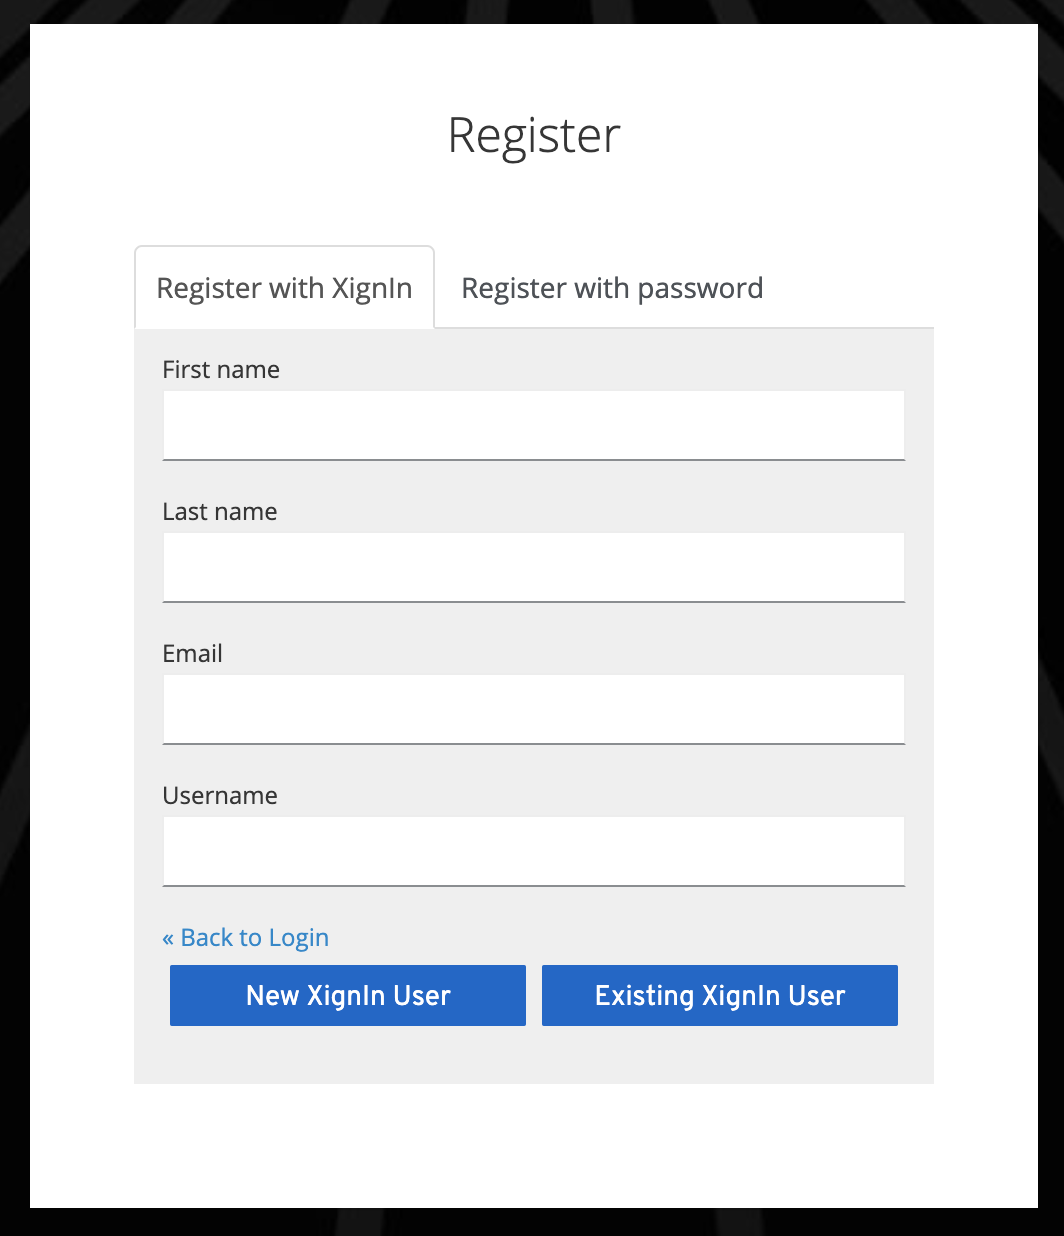
Fig. User Registration Form
¶ Plugin Configuration
To use the onboarding plugin, Keycloak has to be configured as a client for XignIn the redirect uri has to be in the form of:
http://<keycloak_url>/auth/realms/<realm>/((xi-api/(account|registration)/redirect)|(login-actions/required-action))
for the plugin to be able to do its magic properly (See XignIn-Manager User Documentation
for further information on how to create a client for XignIn). When activating the admin console theme for XignIn, a new menu item XignIn will be available
in the navigation sidebar.
In the Onboarding Settings tab the meta data json file can be uploaded.
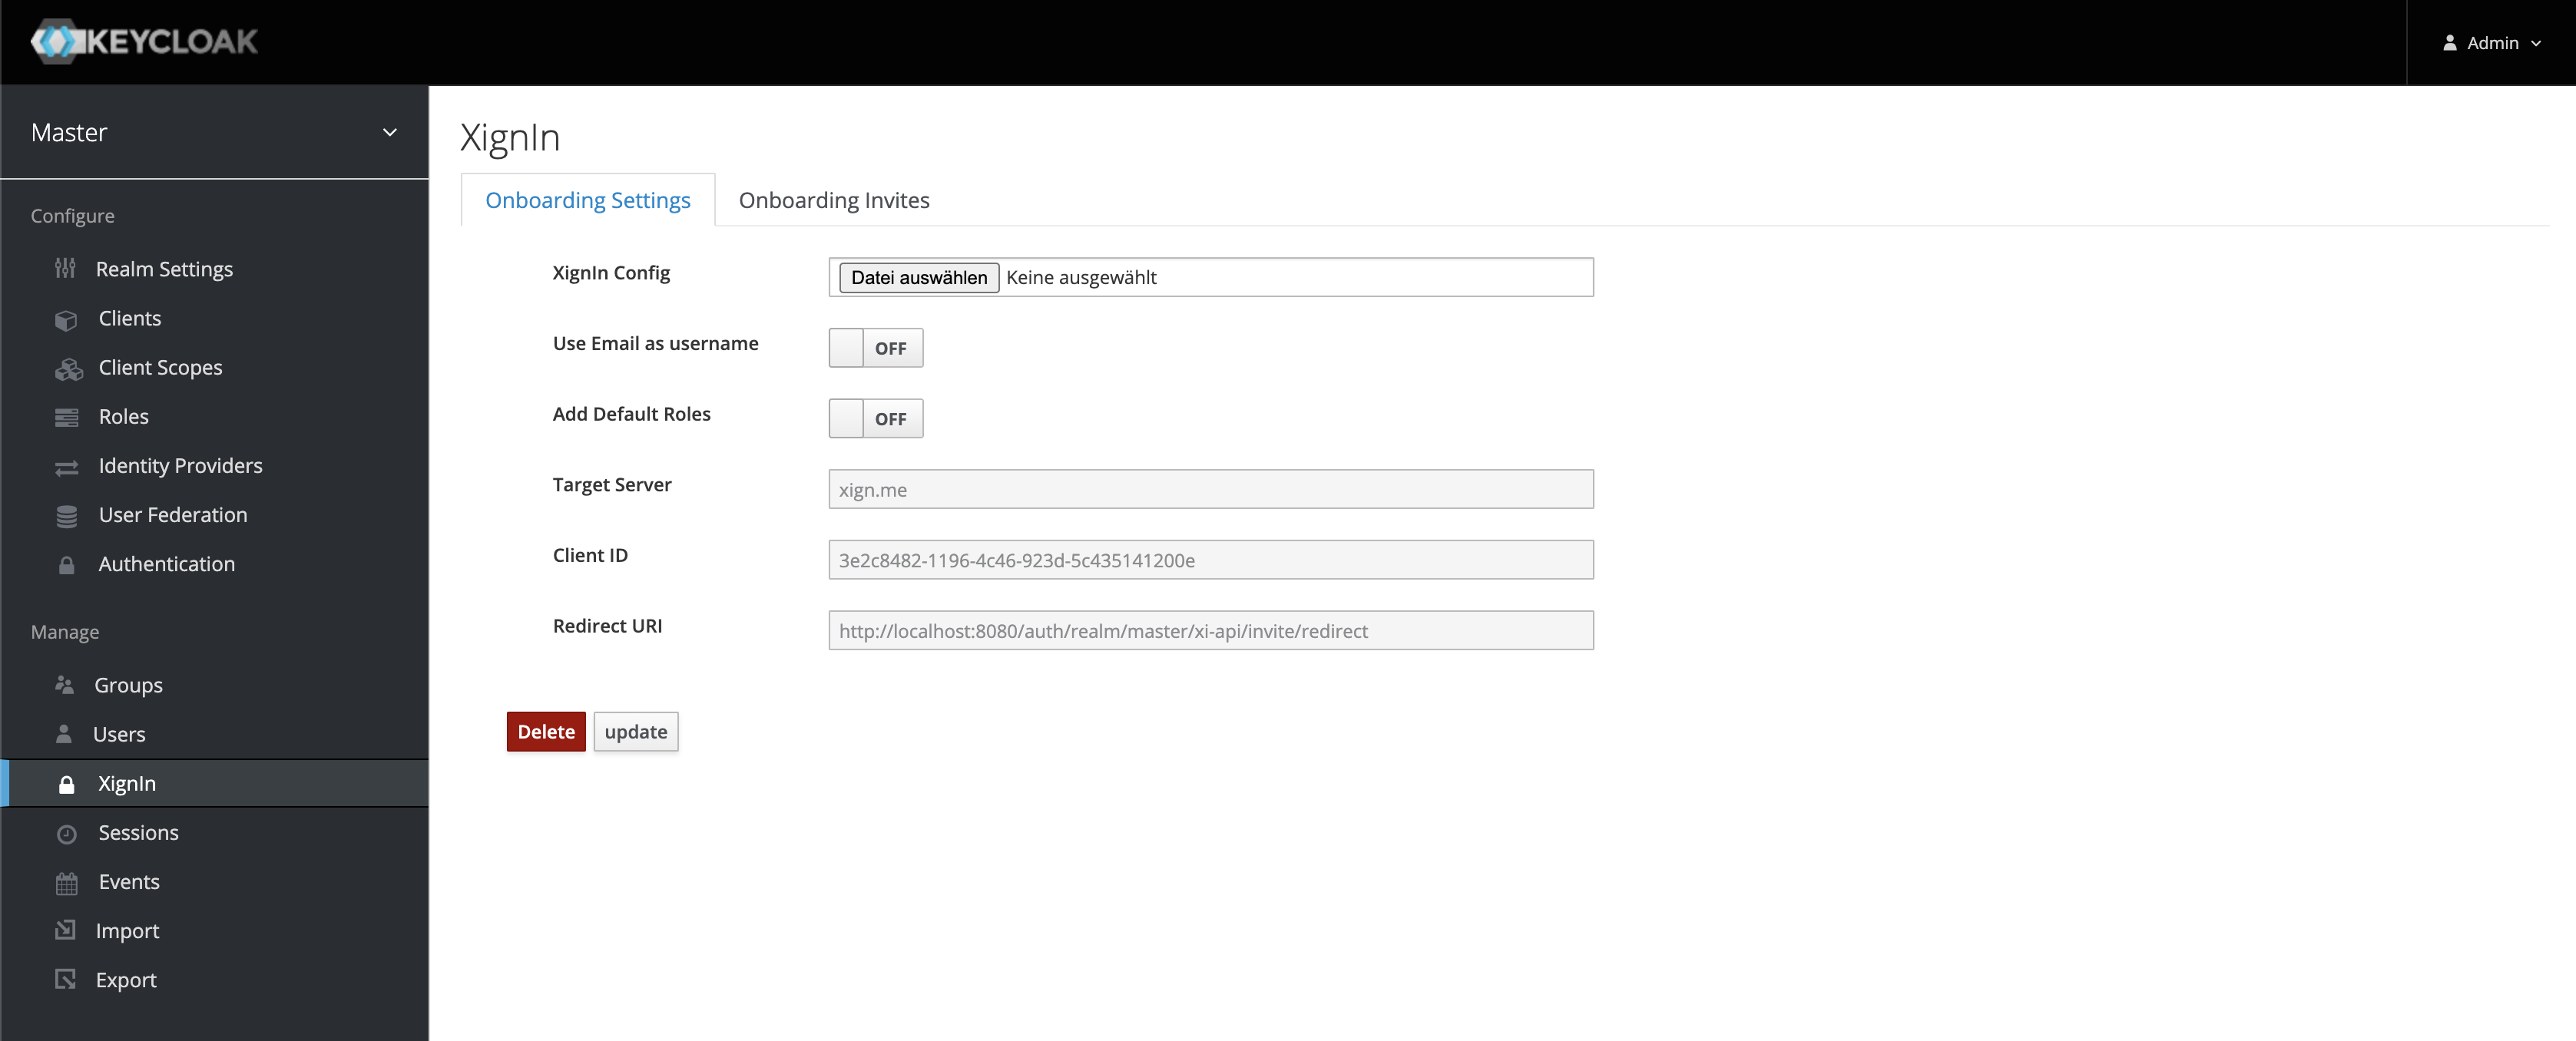
Fig. Management Plugin View
¶ Settings
| Option | Description |
|---|---|
| XignIn Config | The file to upload |
| Use Email as username | Configures the realm to use the email address as the username for the user, when creating users via the authentication plugin (The email has to be available in the authentication response otherwise an error is thrown) |
| Create Authenticator Flow | If this option is activated, the onboarding plugin will automatically create an authentication flow for XignIn based on the uploaded meta data |
| Add Default Roles | Whether default roles added to user account (when not adding default roles the registered user (THROUGH REALM SELF-SERVICE) cannot edit his account information) |
In the Onboarding Invites tab the users, that are not using XignIn are listed and can be invited.

Fig. XignIn Inviteable Users View
¶ Integration via XignIn Authentication SPI v2
The plugin provides a XignIn authentication flow to be used to authenticate users. The authentication can be automatically configured, when uploading the client meta data.
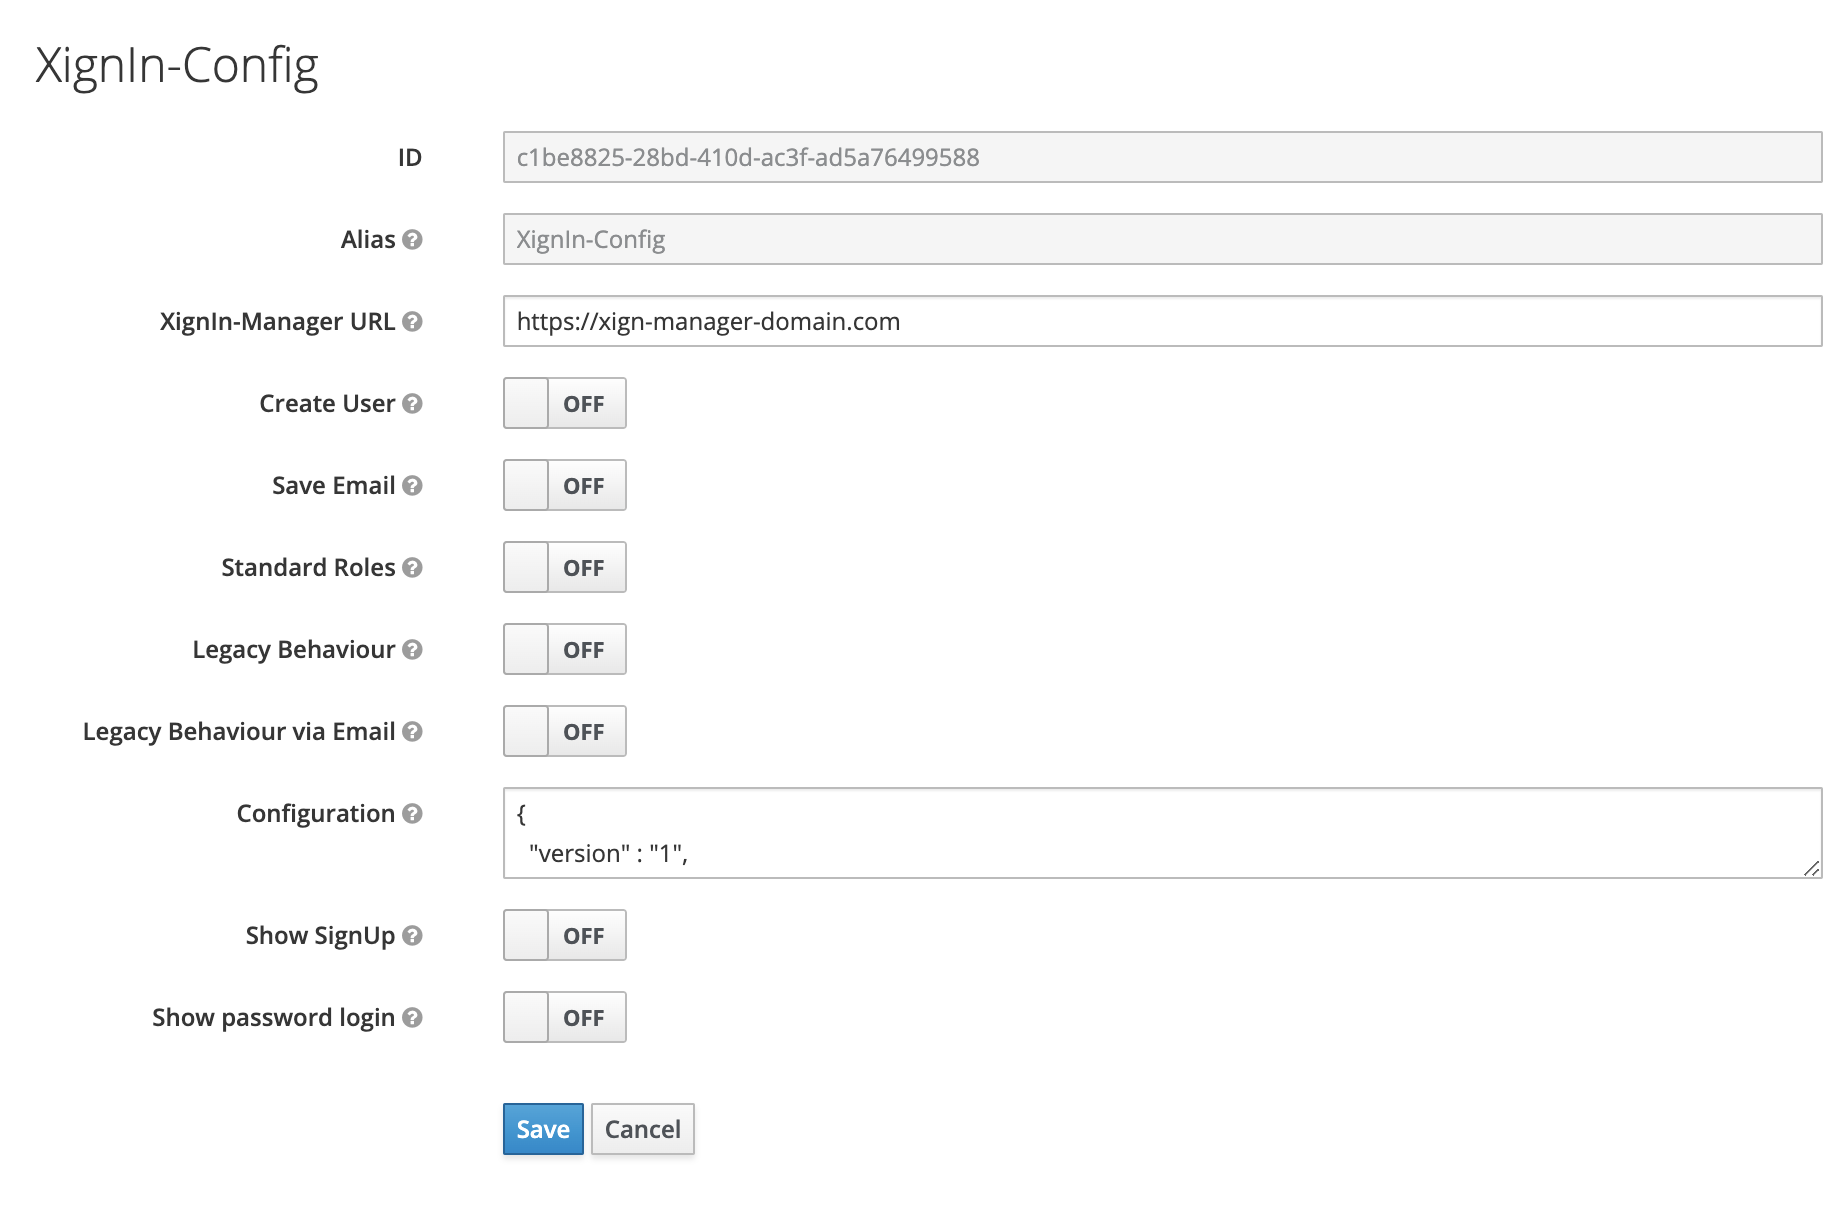
Fig. Authentication SPI Configuration
¶ Plugin Configuration
if the option Create Authenticator Flow is used when uploading the meta data file the authenticator is configured automatically. This behaviour is only available when the management plugin is deployed.
| Option | Description | Required | Default |
|---|---|---|---|
| Alias | The alias for this configuration | x | none |
| XignIn-Manager URL | The url of the corespondign XignIn-Manager | https://xign.me | |
| Create User | Enables the creation of a Keycloak user, if no user was found | false | |
| Save Email | Saves the email address, if provided in authentication response (used only when creating new users) | false | |
| Legacy Behaviour | If users were created with the previous version, no idp link will exists, enabling this option allows these users to login regardless. A idp link will be created when first logging in | false | |
| Legacy Behaviour via Email | The plugin will try to find legacy users via their email address, that was returned in the authentication response | false | |
| Configuration | The contents of the client meta data json file | x | none |
| Show SignUp | Enables the Registration link on the login form, when using the XignIn Browser Execustion. The link will only be visible if the realm has activated registration and this option is enabled | false | |
| Show password login | Enables the login via password. If enabled a second tab is shown on the login form to enter username and password | false |
¶ Plugin View
The Login form will look like this:
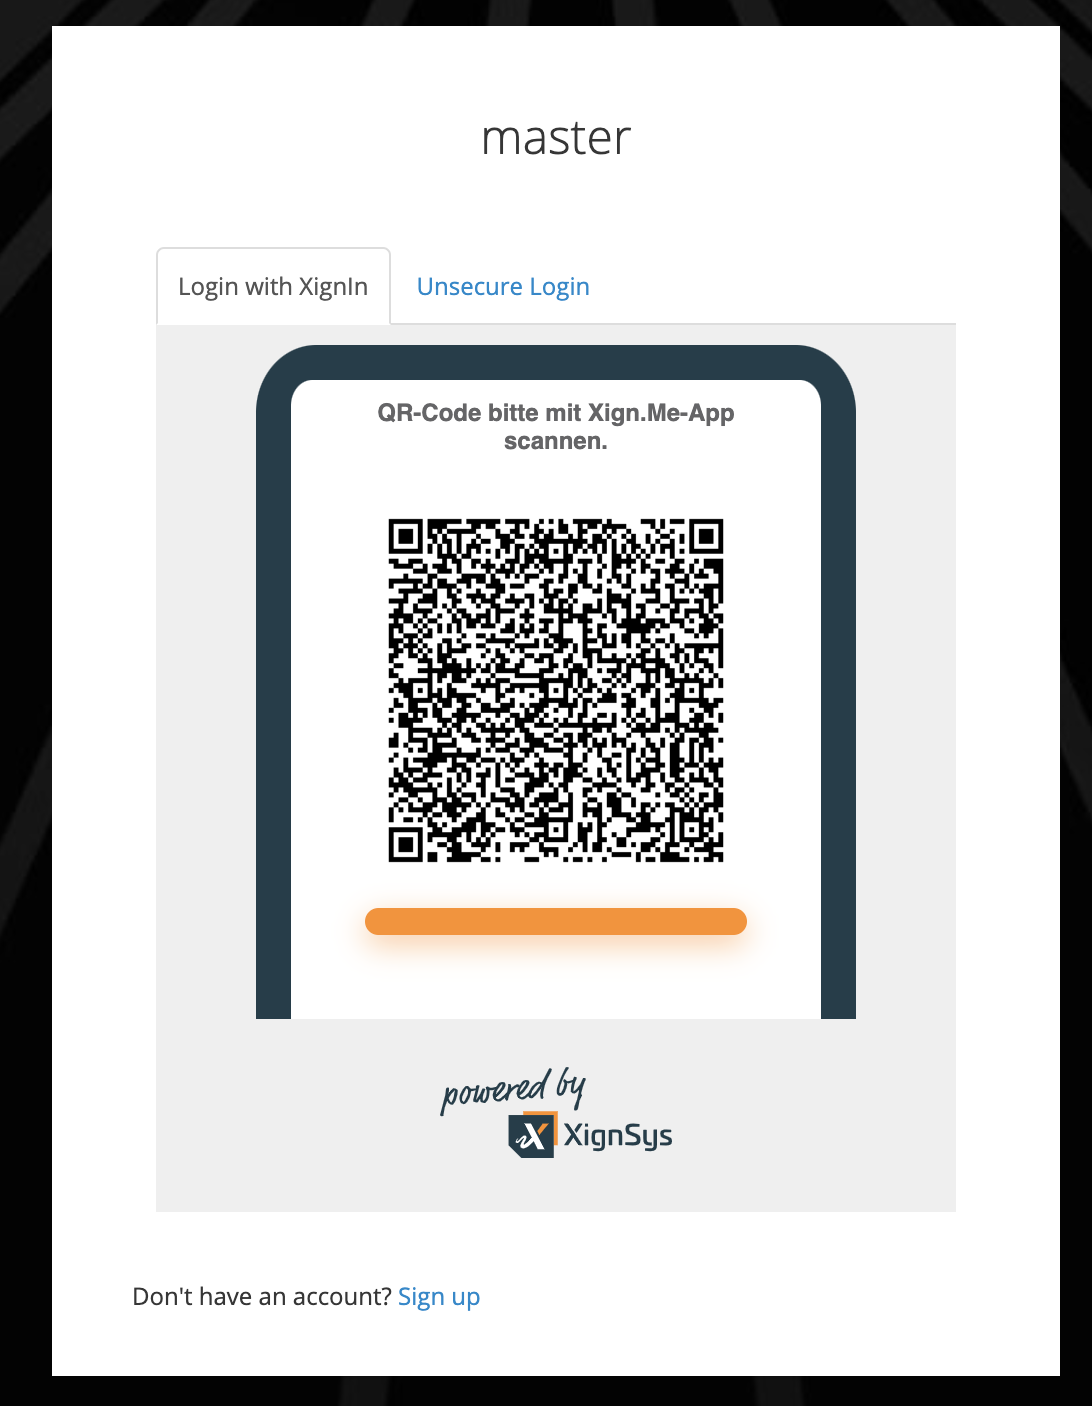
Fig. XignIn Login Form
After the execution is successfully configured you are able to use the authenticator. You have two options:
- Activate the authenticator for the entire realm
- Activate the authenticator for specific clients only
¶ Activate for entire realm
To activate the authenticator for the entire realm you have to override the browser binding. Go to Authentication > Bindings and select the newly created flow from the Browser Flow drop-down-list and click Save.
¶ Activate for specific client
To activate the authenticator for a specific client only, go to Clients and open the settings for the client you want to activate the authenticator for. Scroll down to bottom and expand the section Authentication Flow Overrides and select the newly created flow from the Browser Flow drop-down-list and click Save.