¶ WordPress Plugin
This WordPress Plugin will extend your Standard WordPress Login Page with a QR-Code (or Button on Mobile Devices), which you and your Users can interact with using the Xign.Me App to sign in Passwordless and Securely into your WordPress Site.

We currently also support the Frontend Login that is provided by the WP-Members Plugin.
¶ Prerequisites
Make sure that you have created an Account and an Organization at the XignIn-Manager. Before you create a new Service for your WordPress Site, you will need to find out, whether your Site has enabled the necessary PHP Modules for the Plugin Cryptography to work. Ideally you have installed the PHP Module GMP or BCMath as a fallback. If you have neither or are uncertain you should choose EC Encryption when creating a new Service.
¶ Plugin Installation and Configuration
- If the Plugin has already been released to the WordPress Plugin Store you can simply install it from there. Otherwise you will probably have received a zipped File containing the Plugin. Navigate to the Admin Dashboard of your Wordpress Site and go to Plugins -> Install -> Upload Plugin and upload the zipped File you have received.
- After the Installation is complete you can Activate the Plugin. You should now see a new Menu Item in the Sidebar on the left called XignIn Settings. If you navigate to this Page you will be presented with a File Upload Form where you will need to upload the Config JSON File you can download from your Service Page at the XignIn-Manager.
- Once you have Uploaded your Config File the Settings Page should refresh and show you all Plugin Settings you are able to configure.
¶ Plugin Settings
Here are the Settings you can currently configure for the Plugin
¶ Redirect Path After Login
This Setting configures the Path that Users using Xign.Me will be redirected to after a successful authentication. The Plugin will determine the correct redirect behaviour by evaluating whether a next_url has been set prior to scanning the QR-Code, so that if a User wants to access a certain Page and is asked to sign in, they will be redirected to that Page instead of the configured redirect path.
Default: The Base Domain of your WordPress Site.
¶ User Role on Registration
This Setting configures what Role a new User will receive, should they have created their WordPress Account using Xign.Me.
Default: The Setting that is currently defined in your WordPress Settings.
¶ XignIn Login Options
Be careful changing this Setting, since this might lock you or some of your Users out of the Site if they are not using Xign.Me for their WordPress Accounts.
This Setting configures, whether the default Username and Password Login will be enabled or whether Users can only sign in using Xign.Me.
Default: Both Logins are enabled.
¶ Update User Info on Login
This Setting will update the User Information of Users signing in using Xign.Me. So should their last name for example be changed at the XignIn-Manager, this change will then propagate to your WordPress Site should this Setting be enabled.
Default: This is disabled by default.
¶ Landing Page
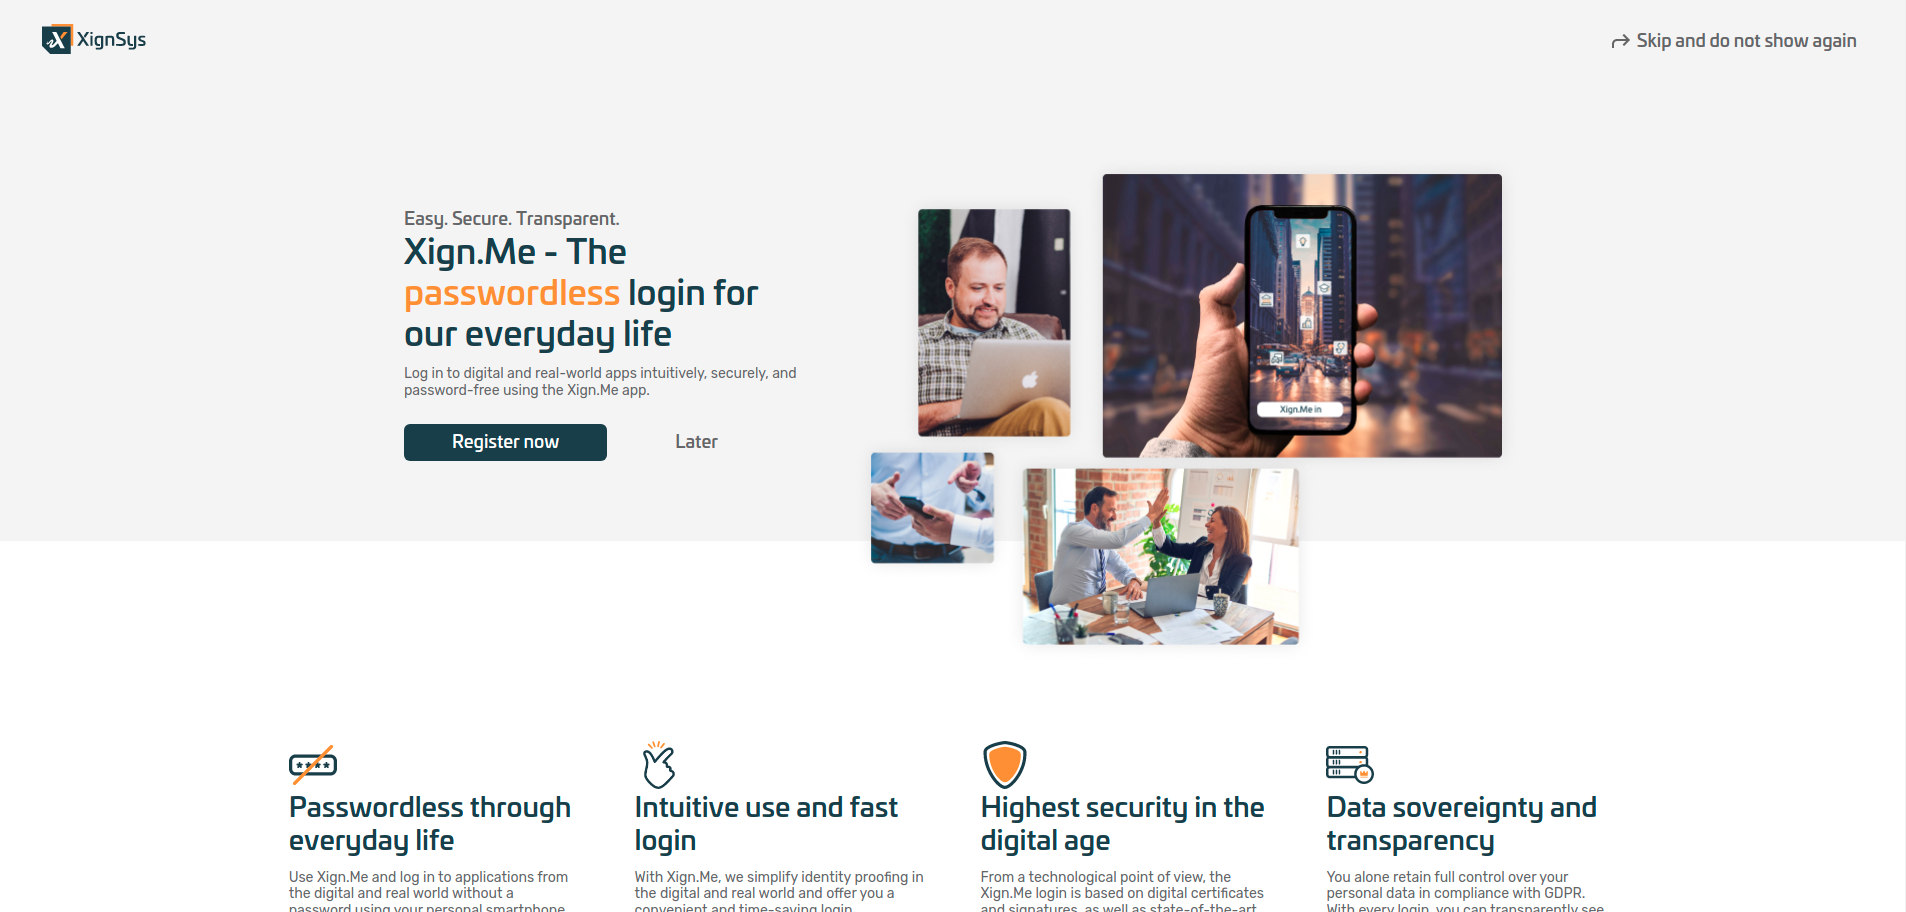
With the Landing Page Settings you can enable or disable a Landing Page, which will be displayed after a User signs in using the default Login. This Landing Page displays some Information about Xign.Me and gives the User the Opportunity to create a new Xign.Me Account and immediately connect the new Xign.Me Account to their WordPress Account.
The Landing Page URL Slug configures the Path at which the Landing Page will be shown. You might need to adjust this path to your current Permalink Structure.
Default: The landing Page is disabled by default.
¶ Connecting Accounts
Users have several different ways to connect their WordPress Account to their Xign.Me Profile. Once a User has connected their Accounts they can use the Xign.Me App to sign in to your WordPress Site.
The ways to connect a WordPress Account to a Xign.Me Profile are:
-
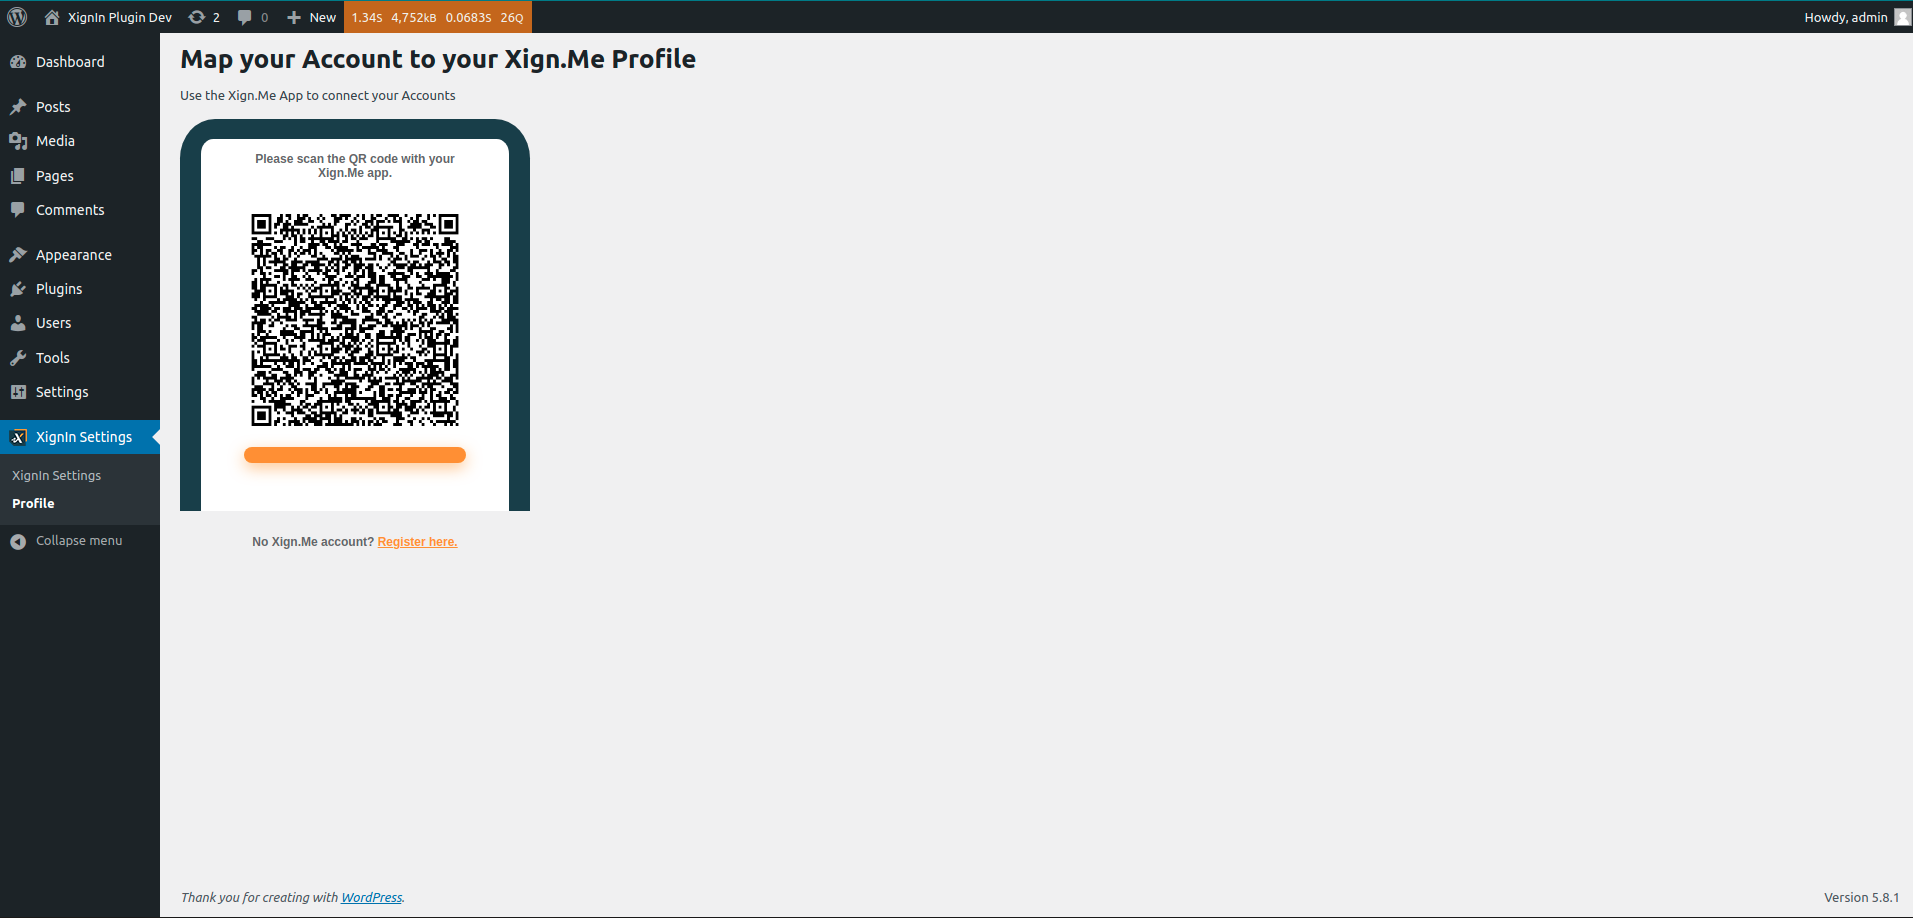
On the Admin Dashboard every User can Access their Profile Page below the XignIn Settings Menu. On that Profile Page a QR-Code will be displayed. Should the User scan that QR-Code using the Xign.Me App the Plugin will connect their Xign.Me Profile to the currently logged in WordPress Account.
-
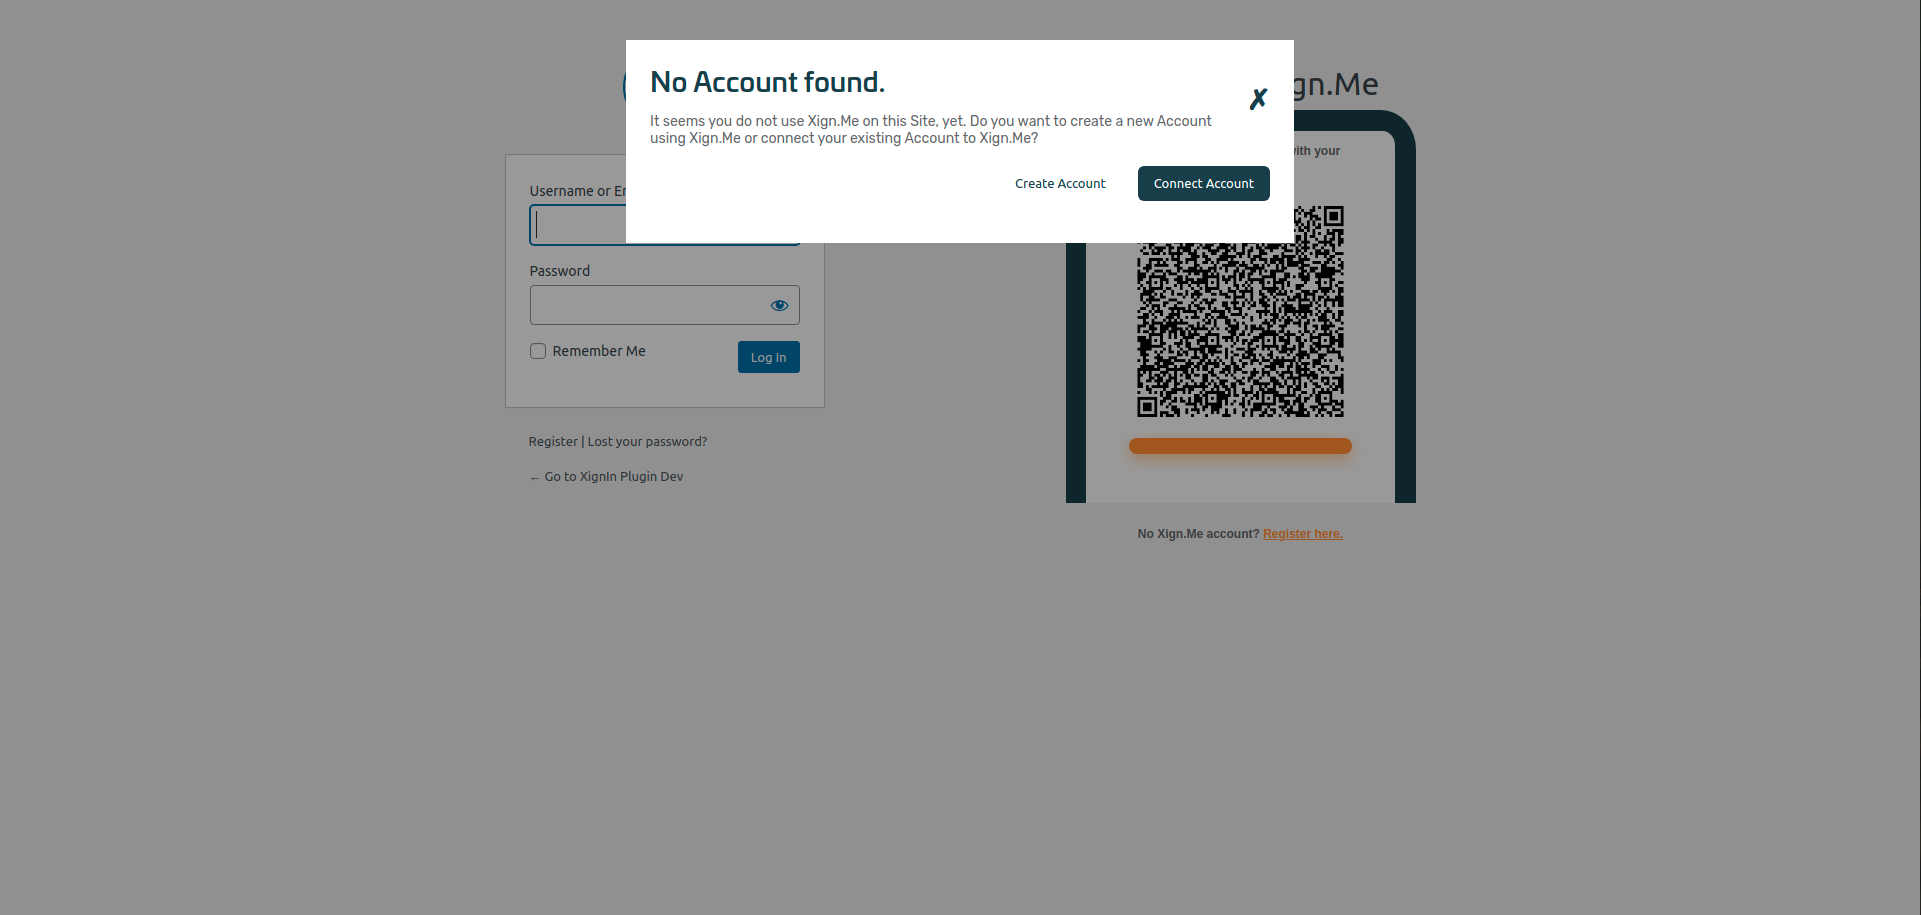
When a User scans the Login QR-Code using a Xign.Me Profile that is not yet connected to any WordPress Accounts on your Site, a prompt will be displayed to the User asking them if they want to connect their Accounts by signing in to their existing WordPress Account via Username and Password or if they want to create a new WordPress Account, using the Data provided by Xign.Me.
-
If the WP-Members Plugin is installed and active, you can generate a Mapping QR-Code, similar to that from the Profile Page and display it on a Page on the Frontend. For more information on this Navigate to the WP-Members Section of this Document.
-
After creating a new Xign.Me Account via the Landing Page, Users will be redirected back to your WordPress Site and the newly created Xign.Me Account will be connected to their WordPress Account.
¶ WP-Members
The WP-Members Plugin by Chad Butler is currently the only Frontend Login Plugin we support.
This Plugin extends the WordPress Frontend by a new Login and Registration Page, as well as hiding Pages on the Frontend from Users that are not signed in. The Frontend Login Form provided by the WP-Members Plugin will automatically be extended by our QR-Code or Mobile intent Button, should both Plugins be installed and active.
¶ Mapping Shortcode
Because the WP-Members Plugin restricts access from certain Frontend Pages it is possible to create a seperate Profile Page, where Users can connect their Xign.Me Profile to their WordPress Account. The design of that Page is completely up to you, all you need to do is create a section for the QR-Code and paste the following shortcode into that section:
[xignme_account_page]
The Plugin will then render the Mapping QR-Code and a Headline in place of the Shortcode.
¶ FAQ
The Site is loading for a long time or showing errors after the QR-Code has been scanned. What is going on?
You are probably missing the PHP extension GMP. We use this extension for cryptographic calculations, and while the Plugin will work using the BCMath extension, we found out that it is generally faster and more reliable to use the GMP extension. If installing the GMP extension (or even the BCMath extension) is not an option for you, you can try to disable the Token Encryption in the XignIn-Manager. The communication will still be TLS Encrypted, this will just remove our additional encryption layer and might speed up processing times.
I disabled encryption in the XignIn-Manager, but the cryptography Errors still persist.
While you can disable the encryption of ID Tokens, the Tokens will still be cryptographically signed to ensure authenticity. Make sure, that your Service uses RSA Encryption and not EC in this case, since you are most likely missing the GMP extension.
Landing Page results in 404 not found or similar errors
Depending on your WordPress Permalink Settings you will need to adjust the Landing Page URL in your XignIn-Settings so that it fits your Permalink structure.