¶ About
¶ Settings
In this section the admin is able to configure the client, e.g. roles, name, redirect uris, memberships, status, required data, etc.
¶ Information
The Information section contains the some basic information about the configured client/service. The information consists of:
- The name of the configured client
- The configured redirect_uri
- The login domain/origin from which the qr code is requested (affects only direct integration)
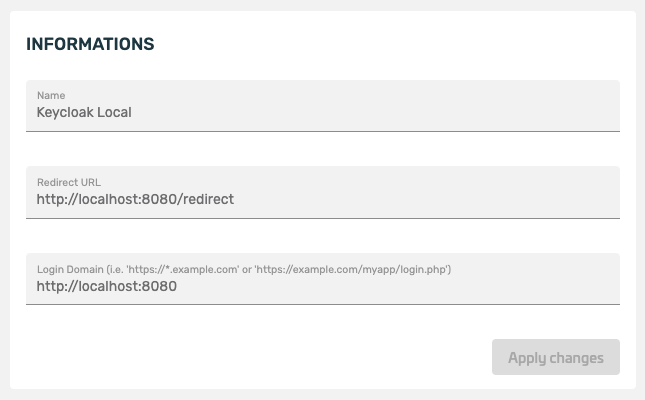
Fig. Example Information View
¶ Configuration Guides
The downloadable Configuration Guides contain information on how to integrate XignIn into certain applications or using certain technologies:
¶ Applications
- Dracoon
¶ Technologies
- OpenID Connect
- Javascript
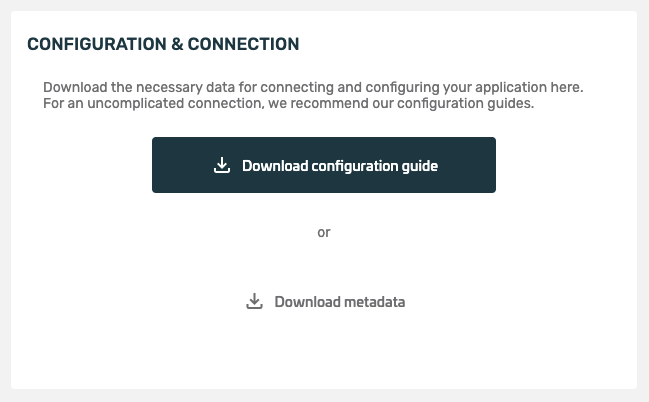
Fig. Example Configuration Guide
¶ Basic Settings
The Basic Settings section lets the admin configure:
- The state of the service, i.e. activated or deactivated
- Whether an invitation is required to use the client
- Whether a membership in the organization of the client is required to use the client

Fig. Example Basic Settings
¶ Required Data
The Required Data section lets the admin configure which data is required to be able to successfully process the authentication result and thus shall be returned by the XignIn-Manager.
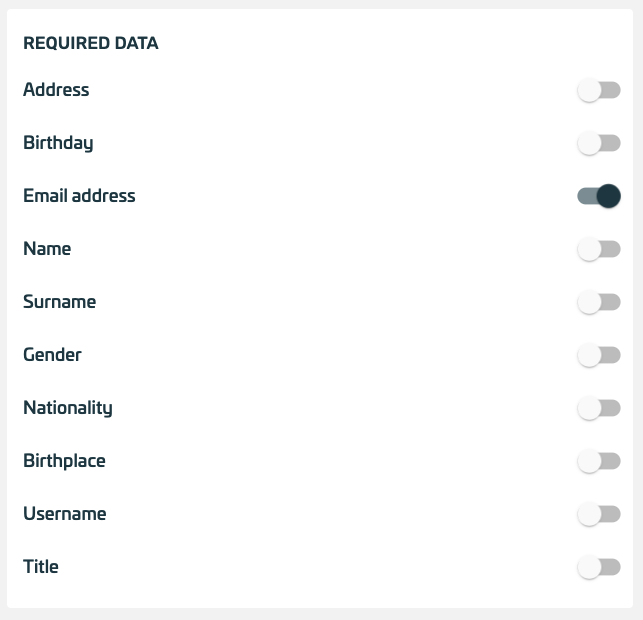
Fig. Example Required Data Settings
¶ ID Token
The ID Token section lets the admin configure:
- Whether the token should be encrypted
- Whether the token is encrypted symmetrically or asymetrically
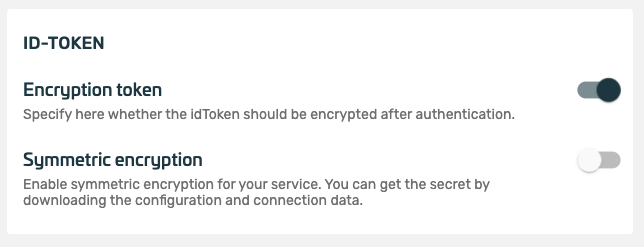
Fig. Example ID Token Settings
¶ User Info Endpoint
The User Info Endpoint lets the admin configure the encoding of the token that can be retrieved from the user info endpoint after a successful authentication:
- Plain JSON the token is encoded as a standard JSON object
- Signed JWT the token is encoded as a signed JWT (JWS)
- Encrypted JWT the token is encoded as a encrypted JWT (JWE)
- Signed & Encrypted JWT the token is encoded as a signed and encrypted JWT (JWS + JWE)
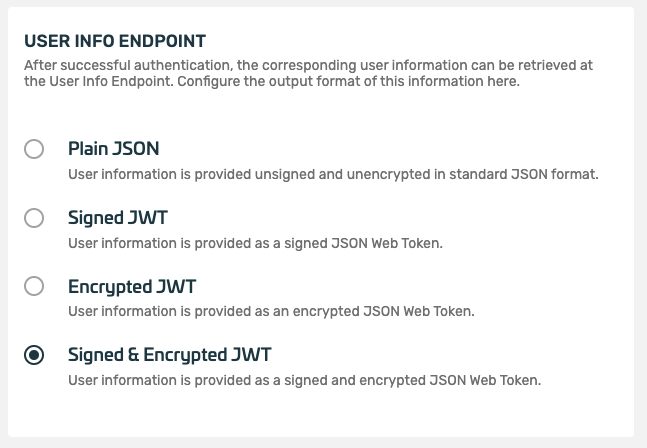
Fig. Example User Info Endpoint Settings
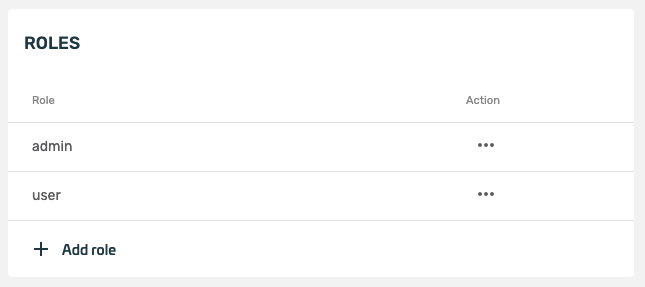
¶ Roles
The Roles section lets the admin configure which roles are available in the client. Further a set of authenticators is assigned to each role, that the user has to use to successfully authenticate using that role. The standard set of roles contain the admin role, that is assigned automatically to the creator of the client. The user role is assigned to any other user of the client automatically.
¶ Delete Service
Lets the admin delete the current viewed client
¶ About
Your content here
¶ Users and Permissions
In this section some user management for users/members of the client can be configured. Key functionalities are:
- Invitations, that are necessary if the client is invitation only
- Assignment of roles, that are available in the client, to a user
- Permissions of a user

Fig. Example Users and Permissions Settings
¶ Filter
Your content here
¶ Invite Users
Via Invite Users a user can be invited using the email address. If a user already has an activated XignIn account assiciated with the email address the user is invited to the client.
The user will have to actively accept the invite before he becomes a member of the client
If there is no account associated with the account, the user will receive an email which can be used to activate the user's smartphone.
The invitation will be automatically accepted when activating the smartphone
If the user has already an account, but the account is associated with another email addressi.e. already has an activated XignIn App, the user will receive an activation email on the newly supplied address. When the user scans the activation qr code, the new address will be associated with the user's membership.
The invitation will be automatically accepted during the activation process
¶ Permissions
Permission lets the admin configure which actions can be performed by a user in this client. The permissions cover following categories:
- client user management (invite/remove users)
- permission assignment
- role management and assignment
- service/client management
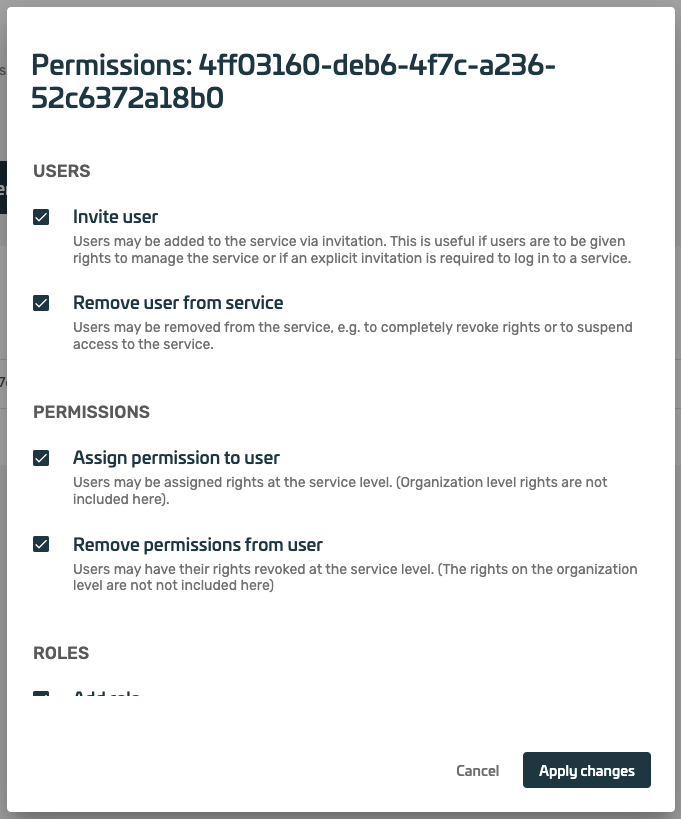
Fig. Example Edit Permissions Dialog
¶ Assign Roles
Members of a client can be assigned a role in this client, that can be relayed to the requesting applications.
The role has to be configured via the Roles section in the client to be assigned to user
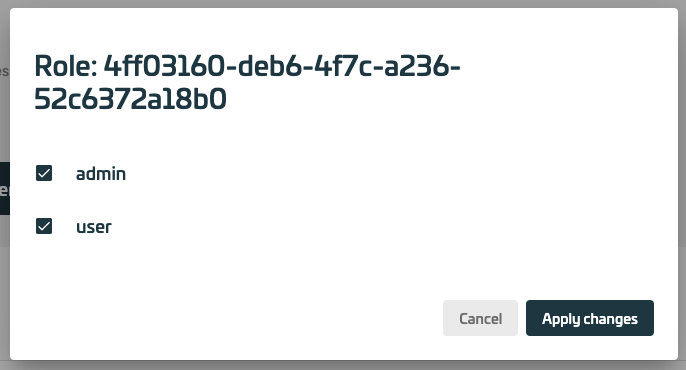
Fig. Example Example Assign Roles Dialog
¶ Remove Users
Users can be individually removed from a client.
Note that the user's account will not be deleted