¶ About
Services are created in an organizational structure. This allows multiple services to be combined into one organization.
¶ Create organization
To create a service in the XignIn Manager, a custom organization must be created first:
-
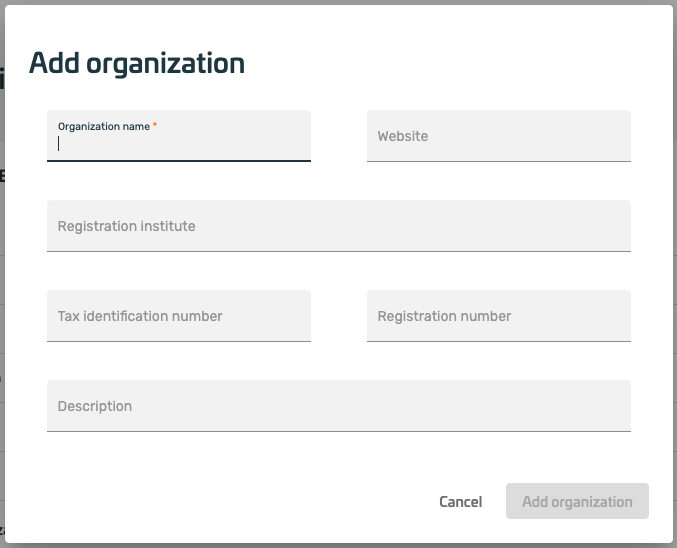
after successfully logging in to the XignIn Manager, Add Organization must be selected in the left menu.
-
thereupon a form opens, with which organization data can be indicated. The necessary fields are marked accordingly (with an *).
- after the organization has been created, it can be edited by clicking the edit button.
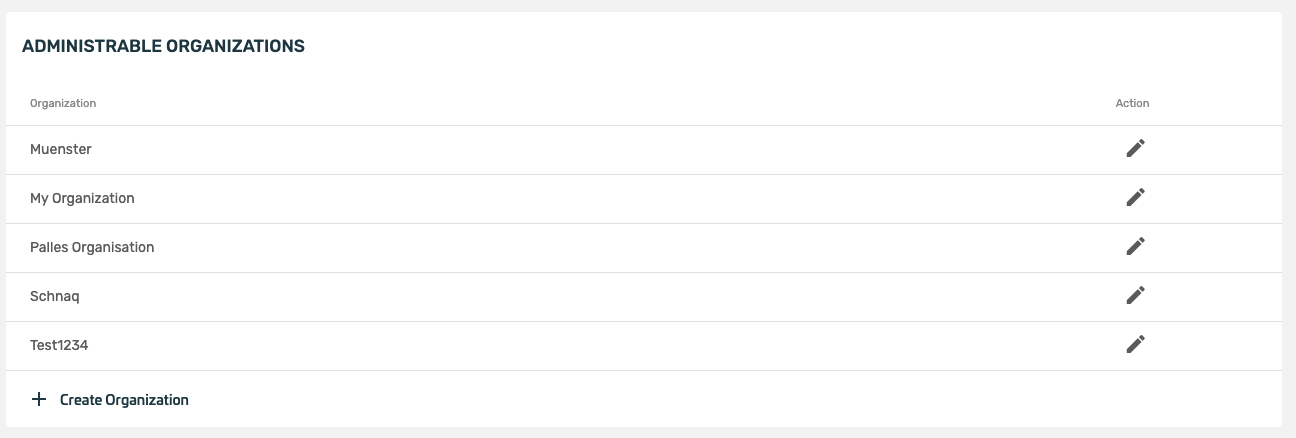
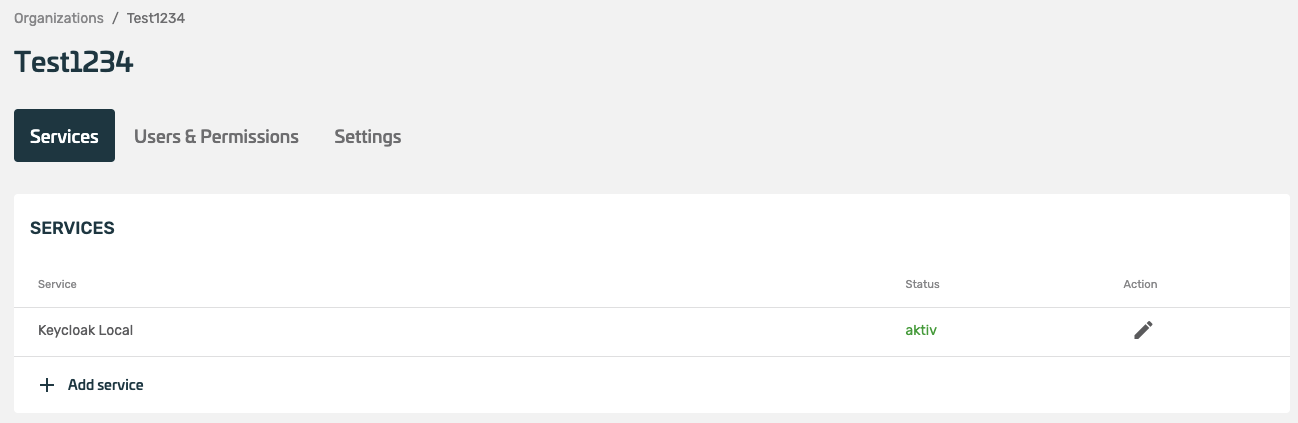
- The overview of the organization shows various setting options. A new service can be added here under Services.
¶ Add & configure services
By adding a service, a new XignIn connection can be created. The integration of the XignIn technology is based on the OpenId Connect protocol. Various libraries from XignSys GmbH or OpenSource are available for this integration. No matter which solution you use (OpenId Connect, or a XignSys GmbH solution), the following steps are necessary to create a configuration for your service in the XignIn Manager. After confirming the "Add Service" button, a dialog will open.
- the dialog shows a form, that has to be filled with the appropriate information to configure the service initially
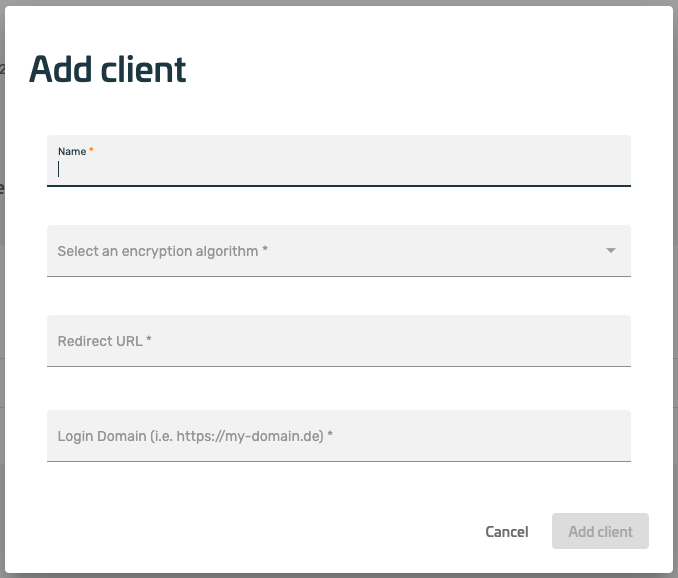
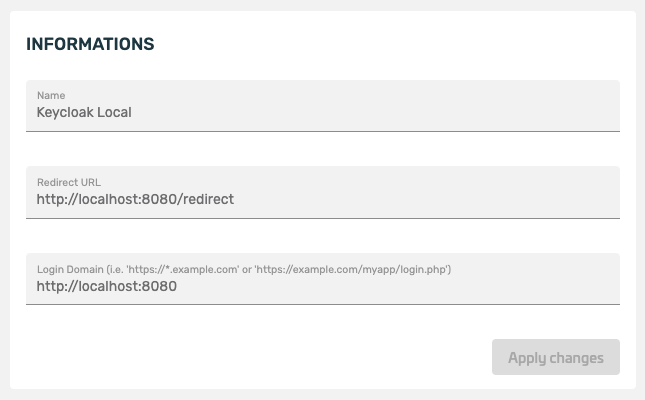
- Name:
A name for the identification. - Encryption Algorithm:
The encryption algorithm specifies the algorithm for encrypting the OpenID Connect token, which can be retrieved from the server after authentication. This token contains the information of the user who authenticated (including a sub, which is a unique mappingId of the user for the service), - Redirect URL to:
The URL specified here will be called after authentication is successful. The browser will receive this URL as a response when the QR code has been used successfully, to authenticate a user. It corresponds to the redirect_uri parameter of an OpenId Connect implementation. - Logon Domain:
The login domain specifies the origin of the QR code request. The server will only accept requests for the service from the specified domain. Typically, the domain through which a login is to be performed is specified here. Wildcard support is supported, for example, the login domain https://*.example.de can be specified to perform a login on the following domains: https://dienstA.example.de or https://dienstB.example.de.
- When the service is successfully created, it will be displayed as follows. The edit (pencil) button can be used to configure the service.
- in the edit view, the service can be configured:
 |
 |
| Fig. Basic Information | Fig. Required Data |
 |
|
| Fig. Basic Information |
- Information:
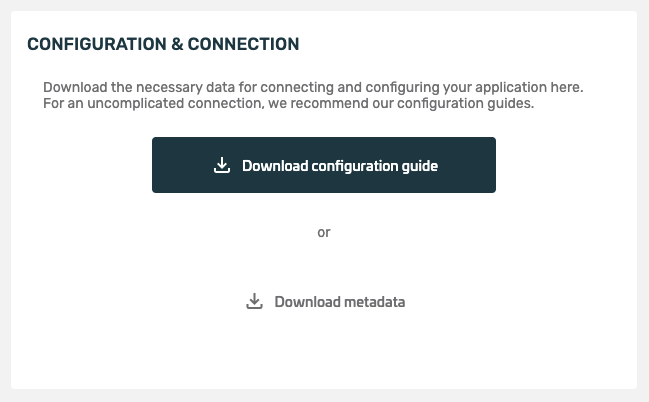
Here you can modify the information that was specified when the service was created. (The only exception is the key material, which cannot be changed afterwards). - Configuration and binding:
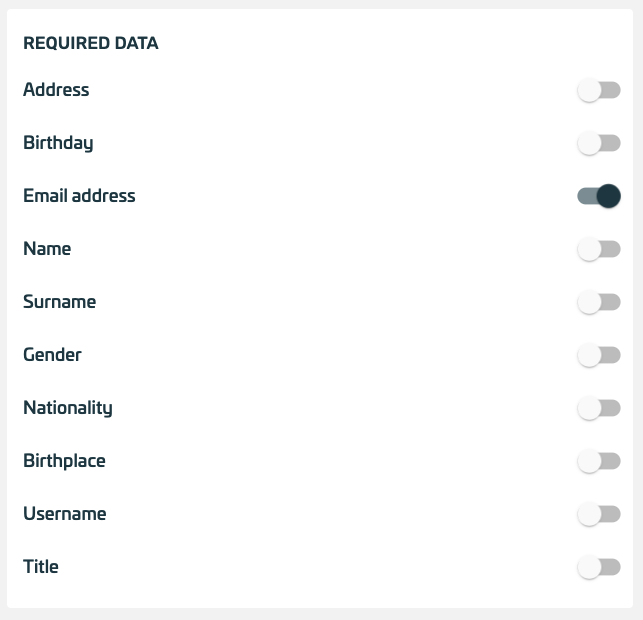
Via Download Metadata, the service configuration can be downloaded as a ZIP file containing all important information for decrypting the OpenId Connect token. The data must be kept confidential. Configuration guides include configuration examples for specific applications - Required Data:
Determines which data is displayed in the Consent screen of the app and transferred to the service provider.
- This tab can be used to configure the users of the respective service. If the item Invitation required is activated, the respective users of the service must be invited here so that they can log in to the service.

Send invitation:
The Invite User:in button can be used to send an invitation via email that gives the invitee direct access to the service. Before the invitee can gain access to the service, the invitee must accept the invitation. This can happen in several ways:
- The invitee already has a XignIn account with the invited email address.
- Then the invitee receives an email with a message informing them of the invitation to a new service.
- The invitee logs into the XignIn manager and accepts the invitation.
- Subsequently, the account is connected to the service.
- The invitee already has a XignIn account with a different email address.
- A complete registration email is sent to the specified email address, since this address is not yet known in the XignIn manager.
- The invitee scans the newly received QR code with his already activated app via the invited e-mail address and enters the PIN. In doing so, he confirms ownership of this "new" e-mail address and adds this e-mail to his account.
- After that, the invitee is automatically added to the service.
- The invitee does NOT have a XignIn account:
- A full registration email will be sent to the email address provided, as this address is not yet known in the XignIn Manager.
- The invitee creates a new XignIn account with the registration mail he received.
- After that, the invitee will be automatically added to the service.
Edit Service Membership:
Via the user overview, the rights as well as the roles of the respective user can be configured via the item Action.
- further configuration of the service:

- Status:
If the service is to be used, it must be enabled here. - Invitation required:
Users can only authenticate to the service if they have been previously invited to the service. That means they have to show up in the service membership with their accounts before they can log in. This can prevent XignIn users from scanning the authentication QR code who do NOT belong to the service. To add users to the service, they must be invited via 2.3) Send Invitation. - Organization membership required:
Users who are allowed to authenticate against this service MUST already be members of the organization that owns the service (users can be added to the organization via an invitation). - Encryption Token:
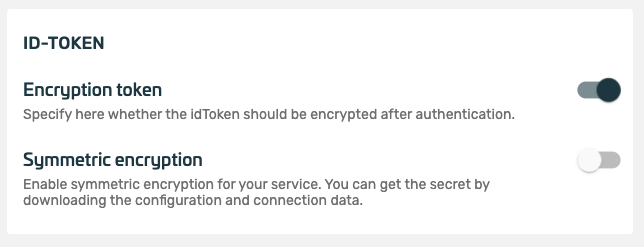
After a successful authentication, the retrievable OpenID Connect token is encrypted and signed. If the token is ONLY to be signed, encryption can be disabled here. - Symmetric Encryption:
In addition to Asymmetric encryption, symmetric encryption can also be enabled.